When you want a business card, postcard, or other flat printed piece to appear as if it’s printed on colored paper, but you’re actually printing on white stock, you can achieve this effect using full ink coverage and proper bleed setup.
This method works for any ink color, whether you want pink, blue, black, kraft or parchment-tone simulations, or bold brand colors.
Here’s how it works.
What Does “Paper Color” Mean?
Instead of ordering pre-colored paper, you print a solid background color across the entire surface of the sheet. After trimming, the piece appears as though the paper itself is that color.
The key is making sure the ink extends fully past the trim line so no white edges appear after cutting.
Step-by-Step: How to Set Up Your File
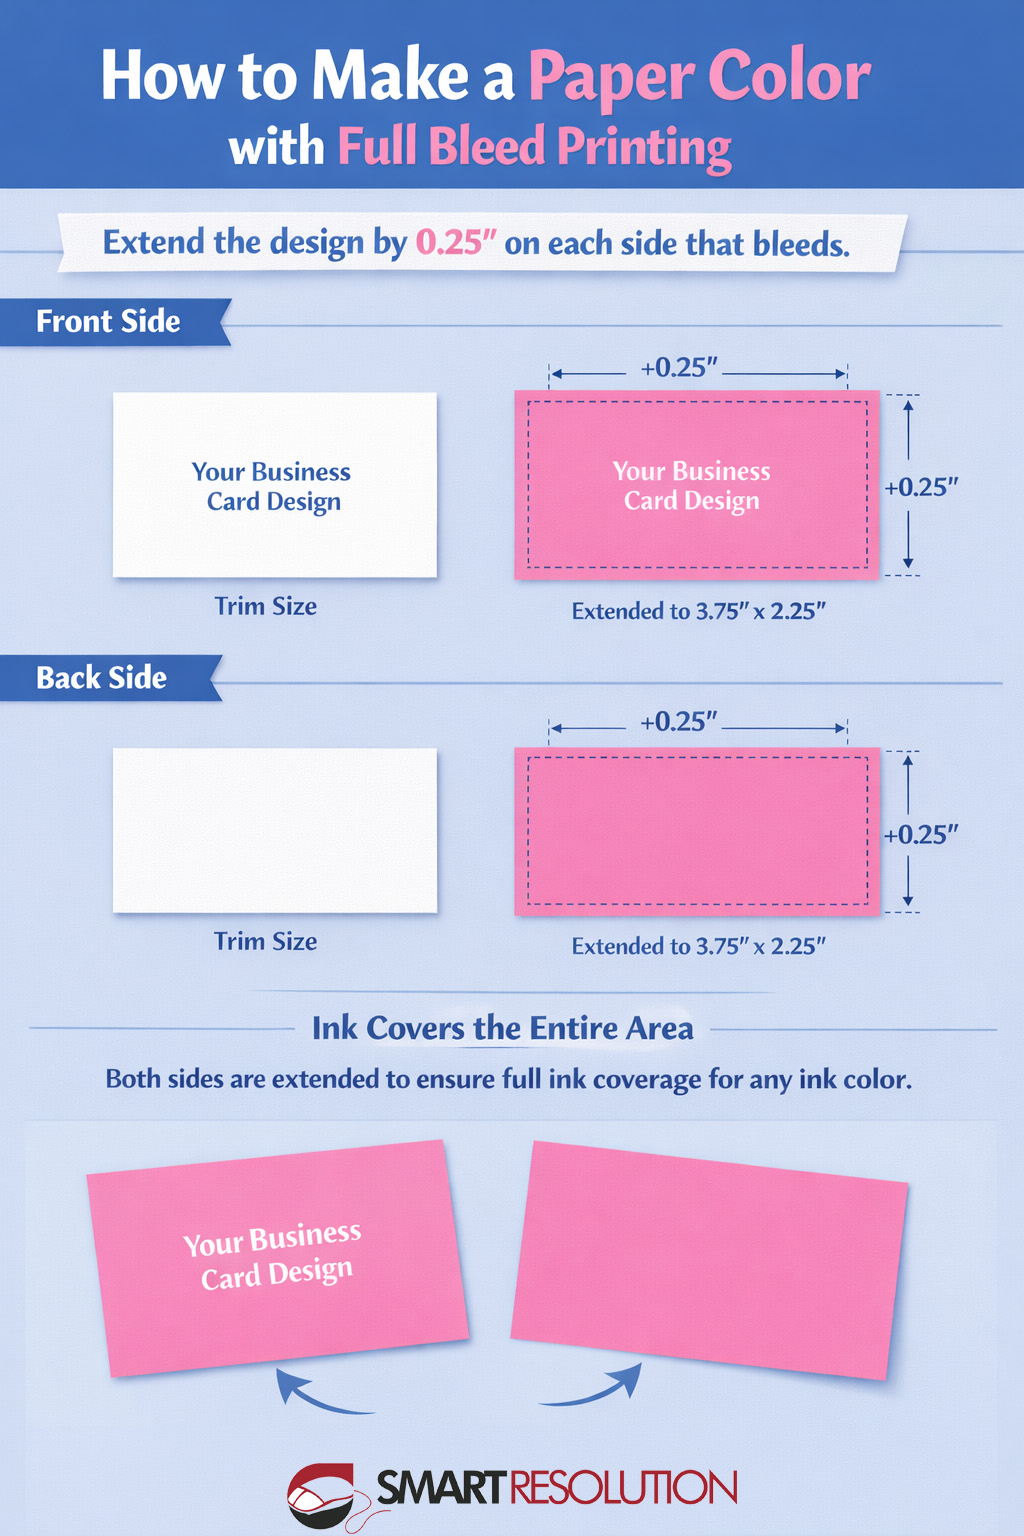
1. Start with the Correct Trim Size
For example, a standard business card trim size is:
3.5″ x 2″
This is the final size after cutting.
2. Add Bleed on All Sides
To ensure full ink coverage, extend your design 0.25 inches on each side that bleeds.
That makes your total file size:
3.75″ x 2.25″
This extra area is called the bleed. It gets trimmed off, but it ensures your background color reaches all the way to the edge.
3. Create a Solid Background Rectangle
Draw a rectangle that:
- Covers the entire extended size (past the paper trim size)
- Is filled with your chosen ink color
- Sits at the back layer of your design
This rectangle is what creates the “paper color” effect.
4. Repeat for Both Sides
If you do not want the back side to be white:
- The front must have full ink coverage
- The back must also have full ink coverage
If only one side is covered, the flip side of your printed piece will reveal white paper.
Why Bleed Is Critical
Printing and trimming involve slight mechanical movement. Even a tiny shift can cause a thin white edge if your background stops exactly at the trim line.
Extending the ink 0.25″ beyond the trim ensures:
- No white borders
- Clean, professional edges
- Consistent full ink coverage
- A true “paper color” appearance
⚠ Not Recommended for Raised Ink Printing
This method is not recommended for raised ink (thermography) printing.
Raised ink creates a textured, elevated effect wherever ink is applied. If you apply full ink coverage across the entire background, the entire surface of the piece will have a raised texture.
This can result in:
- An unintended rough or bumpy feel
- Increased production cost
- Possible cracking or uneven finish
- A heavy, less refined appearance
Raised ink is best used for selective elements like logos, names, or specific design accents, not full background coverage!
If you are planning to use thermography or raised ink, consult your printer or graphic designer before designing a full-coverage background.
Works for Any Ink Color
This method applies to:
- Bright brand colors
- Dark, rich backgrounds
- Pastel tones
- Simulated kraft or muted shades
- Full black coverage
As long as the ink extends into the bleed area, your finished piece will look like it was printed on colored stock.
Important Design Tips
- Keep text and logos inside a safe margin (at least 0.25″ from trim)
- Use rich black formulas if printing large black backgrounds
- Consult your printer about heavy ink coverage limits
- Always export with bleed included
When to Use This Method
This technique is perfect for:
- Business cards
- Postcards
- Rack cards
- Door hangers
- Flyers
- Any full-color flat printed item
Final Takeaway
To create the look of colored paper using ink:
- Extend your design 0.25″ on each side that bleeds
- Fill the entire extended area with your chosen color
- Apply it to both sides
- Ensure full ink coverage past the trim line
Do this correctly, and your finished piece will look like it was printed on colored paper, no specialty stock required.
For more information or to get started with business cards, explore Smart Resolution’s business card design options.